Showing posts with label birthday. Show all posts

19 July 2011

Embossed resist - part two

So, as I promised in my previous post, here's the second part of my resist embossing adventures.

Again, I used the embossed resist technique to create a background, this time a more feminine one.


This background is made using the Hero Arts antique flower backgroundstamp and the flower circle is the poppy background.
Distressed with victorian velvet and fired brick distress ink, added a sentiment and: voilĂ , done :)

I also made a blue variation using stormy sky and weathered wood:


Hope you have a great week!

Bye!

13 July 2011

Embossed resist - part one

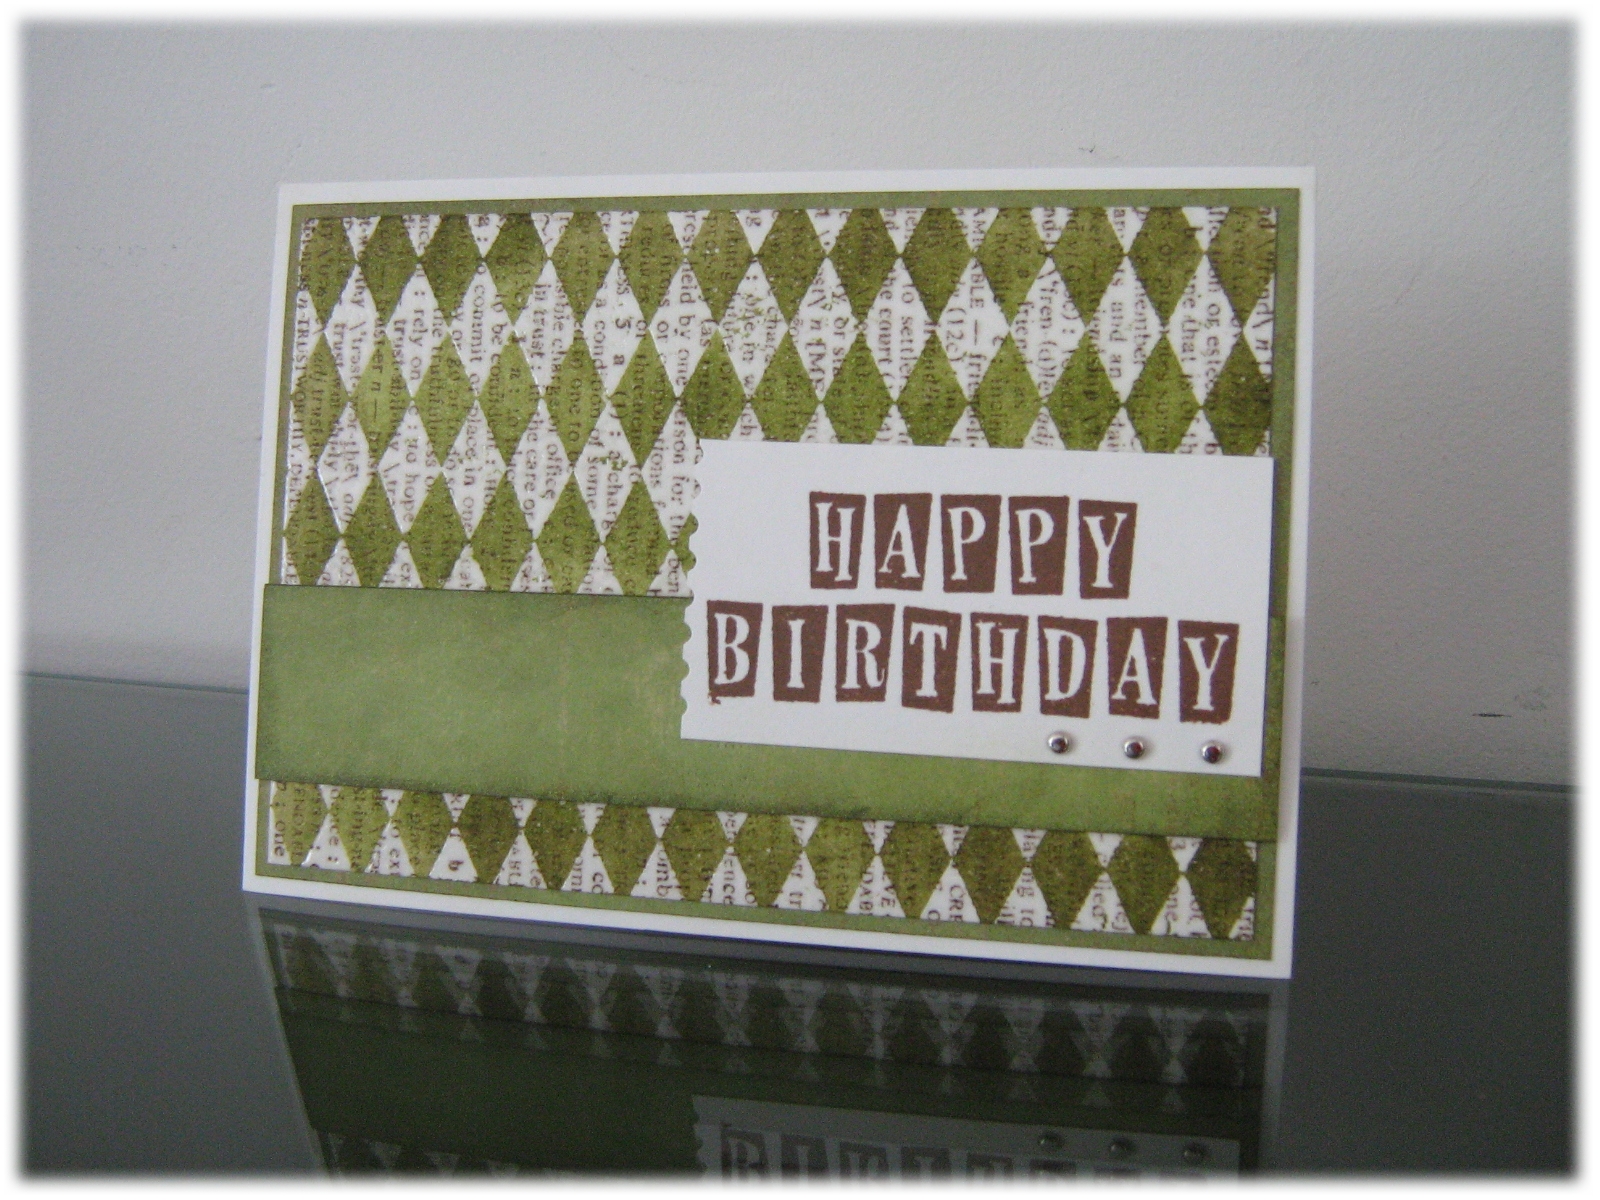
Last weekend, I experimented with the embossed resisted technique.
I used the technique to create some backgrounds.

For this card, I first stamped the friend definition stamp with archival coffee ink.
Next, I stamped a diamond-shaped backgroundstamp with versamark en clear embossed it.
Then I sponged over the card with some distress inks (I think I used peeled paint, forest moss and walnut stain).
To finish it off, I added a strip of cardstock and a greeting (I didn't have the right colour of cardstock, so I took a piece of green and sponged it with the distress inks I used on the background to make it match the rest of the card).

And here is the result:


Here's another picture. I made a few of them, and they all have slightly different backgroundcolors (the one on the left has less green, but more walnut stain).


I'll be back soon with a more feminine card using the same technique.

Thanks for dropping by!

15 April 2011

Black & white

Decided to make a masculine card to enter in the Hero Arts April challenge :)
So with some pieces of black and white cardstock a bit of staming and embossing, this is what I came up with:


Hope you like it!!

Have a great - and sunny - weekend! :)

12 April 2011

Neverending card

A week or two ago, I learned how make a 'neverending card'.
It's a card that you can turn and turn and turn and ... you get the picture ;)

The base of the card is pretty simple, it's the decorating and the stamping that takes up most of the time.

I took pictures of every side.

The front of the card:


If you turn it once, you can see two small tags on which I wrote some birthday-wishes:


Turn it again to reveal the real birthday-wish:


And turn it once more to see the stamping I did on the back:


Turn again to see the front once more :)

I had a lot of fun making this neverending card!! Pity the pictures don't show the colours as they should (I should really learn to take pictures in daylight in stead of at night :p).

Hope you enjoyed it!

Bye!

01 April 2011

March birthday card

March is a month in which we have/had several birthdays and I didn't have that much time to make cards the last few weeks.
And I know it's April already, but I wanted to share the (again :p) quick birthday card I came up with.


A bit of light backgroundstamping and as a focal point, I stamped a flower, embossed it with clear embossing powder and traced the outside with a light blue copic marker.
I've tried to get a close-up of the flower, but it came out a bit blurry...


So, I'm off celebrating Friday-night ;)

Bye!

27 March 2011

Quick birthday card

Just a quick post showing a simple birthdaycard I made some weeks ago.
Inspiration here was Jennifer McGuire, I love her stamping style! :)

I'm off, have a wonderful Sunday!!

22 February 2011

Boxed birthday greeting

A while back, I wanted a bit of a challenge. I wanted to make something completely different.
That's when I thought of a template of a little box that I bought a year ago and haven't used since.

So, for the birthday of my grandmother, who was in the hospital at the time and could definitely use a bit of love and support, I made a box-birthday-card.

I spend about 4 hours making it, but it was well worth it! I think it turned out spectacular :)
Take a look yourself:


This is how it looks from the front. You can see the stamped butterfly that I covered in glossy accents, so it has a nice shine.

I'll give you a look on all the sides of the box...

I stamped the sides of the box with the Hero Arts Antique Flower Background as you can see here:


And on the back,  I attached a tag that I made using a Tim Holtz fragment. Those fragments make the most beautiful additions and I really love using them :)


For those of you who don't understand Dutch, the tag says 'enjoy'.

On the inside, I put a tag with my greeting on it. I also included a tealight as a little gift to lift her spirits.


As far as I'm concerned, this was an afternoon well spent :)

06 February 2011

Recycling canvas

A year or two ago, I bought some painting canvasses because I wanted to try making a painting.
As a lot of ideas that sound perfect in my head - the execution of my plan was a bit harder and now, serveral years later, the canvasses are still as empty as the day i bought them...

To put them to good use, I thought I'd try stamping on them.

This is still something I need to work on, but I think my first attempt didn't turn out so bad.
Here's what I came up with:


I'm gonna go and practice some more... Have a great Sunday!!

05 February 2011

Saturday kissing

What's a better way to relax after a long, stressful week of work than a little crafting time? :)
To really get in the weekend-mood, I thought I'd give the new Hero Arts-challenge a try.
This month, the featured technique is the 'kissing technique' (who can resist such a name? :p).

I found that Hero Arts has some really nice backgroundstamps that are just perfect for this.

Take a look at the card I came up with:


I almost can't believe that the letters started as plain, white cardstock...
This kissing technique is the best! (and I'm not only talking about stamping - LOL)

I'm off to relax some more ;)

21 January 2011

Crazy about circles

As of a week or two ago, I'm the proud owner of my very first circle cutter (one of the newbies I talked about in my previous post. 

And of course, with a new tool, comes the need to experiment and play! :)
So I tried out a few basics and came up with the following card:


I stamped the background with a checkered backgroundstamp and versamark ink.
The only problem was that afterwards, I couldn't emboss my sentiment any more, the embossing powder kept on sticking to the background (even after it was left to dry overnight...).
To solve the problem, I took a white marker and wrote the damn thing myself :p (as you can see, that's not yet one of my specialties).

Another thing I really need to practice, are my coloring skills...
Inside the card, I stamped a little boy which I colored with aquarelpencils (notice the stripes on his face :s) But they say practice makes perfect right? (let's hope so! :p)

Here's a view of the inside:


And that's an other tool tested... up to the next one :)

20 January 2011

Custom embossing

It's been a while since my last blog-message...
The big problem is time...we've had a very busy period at work, so when I got home, I barely had energy left to make diner. Afterward, I would just lie in front of the tv (bright side: I caught up on all the movies/series I've been taping for the last weeks :) )

But today, I managed to squeeze in a little creative time!
Over the last 2-3 weeks, I bought some new card-making-stuff (...some? I'd say A LOT actually :p)
Of course, all these newbies need to be tested and experimented with!
And that's what I did...

For this card I used my new Hero Arts negative flower stamp and let me say I just LOVE it!

Here is the result:

For the embossing, I mixed up some clear embossingpowder with a scoop of red perfect pearls.
The effect in real life is stunning!
You can see it better in the close-up:


Hope you like it...

I'm off experimenting some more, I'm on a roll :)


10 January 2011

Blogging time

After a few days of silence, it's blogging time again :)
Of course I just hopped a few amazing blogs on the Hero Arts blog hop.
The beautiful creations of the different hostesses gave me a lot of inspiration to spend my evening :p

But before I start crafting, thought I'd quickly share a card I made a few weeks ago.
I learned the folding technique from my aunt and think it makes a nice card (although I have to admit that this are not my favourite colors, but this card is for a familymember who turned 91, and she thinks floral/classic are the best :p)

Here's what I came up with:


The tags inside the card have our names and a little birthday-sentiment on them.

And now I'm off to go stamping on this beautiful Monday evening :)

Have a good one!

05 January 2011

And another one

Because I was feeling creative today, here's a second post on this nice Wednesday :)

I gave Lucy's sketch for day 5 a try...

This is what I came up with:


Also a basic one, but I can't wait to send it to someone for their birthday!! :)

And after 2 posts, I'll call it a night... I have to be up bright and early on my birthday tomorrow - LOL! (can you tell I'm excited?! :p )

Goodnight!

Sales ... sales ... SALES :)

One of my favourite things in January...sales, sales and even more sales... :D
Spend all day yesterday (and some more today) strolling around in stores, looking for the perfect addition to my wardrobe and ...of course also looking for the perfect addition to my craft-cabinets !

So this afternoon, tired but satisfied, I started experimenting with my new finds -- which is an absolute MUST after every shopping trip ;)

This first one is inspired by the sketch that Lucy Abrams posted on her blog yesterday.
I just HAD to use the new circle cutter that I purchased and this was the perfect oppertunity!

So Lucy, one day too late, but I hope you still enjoy the card I made :)


Very simple combination of stamping, distress ink and patterned paper...

I wish everyone very productive sales ! :)

28 December 2010

One more floral example

Today I'm sharing another example of the homemade flowers I made here.

I made this card for my sisters birthday on December 26 (so I had to wait a few days to post this one to not spoil the surprise for her...:p).


Did I already say that I really love making them? :)

27 December 2010

Hero Arts challenge December

This is a card I made for the Hero Arts challenge of this month.
Can you see I'm still a bit in the Christmas-mood? :)
Background is stamped with friends definition stamp and Versamark ink.
Also used the dots and flowers background stamp.
You can't tell in this picture, but the sentiment is stamped and then embossed with holographic embossing powder, so it has a nice shine. I put stickles in the middle of the dots and flowers, so that sparkles too. :)


You can see the sparkle on this picture:


Now let's hope I win the grand Hero Arts prize :) (not that the card is the best I made yet, but it would be a nice present on my birthday, Januari 6...LOL).

15 December 2010

Money-saving experiments

Looking at my craft collection and how it has grown in the last few years makes me wonder: how much stuff can a person buy and still not have enough?! There's always a stamp that you love in the store, or another color of distress ink that would fit just perfectly with all the other colors of ink that you already have...
I think everyone who's into cardmaking or scrapbooking knows all too well that it can be an expensive hobby if you don't restrict yourself once in a while.

That is why I try to make the most of my supplies, and that sometimes calls for a little creativity (but that's what this is all about, isn't it? :p)

I've been following this years edition of Tim Holtz' 12 tag of christmas and couldn't help trying some of his techniques myself.
On day 3, he made a beautiful flower out of tissue tape. Because I didn't know where to find the tissue tape here in Belgian stores (and I didn't want to spend money to be honest),  I decided to try to make the flower my own way.
I took the most inexpensive, old paper that I had lying around, stamped it with the friends definition stamp and cut out a spiral.
Adhered it to a punched circle and sprayed with a little pearlized water.

And this is the result:


Doesn't look cheap at all, does it?! :)

Here's a view of the whole card...


And so I've learned that you don't have to spend too much money to create beautiful birthdaycards.

My next experiment: seeing how long it takes me to forget all about the lesson I've learned...! ;)
Ooh, the joy of being a crafter... :)

11 December 2010

Boy / girl

The weekend has finally arrived! Today, I'm going to free up some 'creative time' for myself! I have a lot of catching up to do :)
But before I begin, I just wanted to share 2 very quick and easy cards that I made a while back from a few pieces of leftover paper.
The layout is exacty the same, but one of them is girly and the other one is masculine (btw, I think masculine cards are the hardest! You never know if they're gonna like it, women are much easier :p)

So here they are:


The first one is the masculine version.


And here is the girly one :) Can you see the little stickle-highlighted butterfly? :

What do you think of the little guy? :)


Now I'm off, still need to complete my christmascards... Bye!

03 December 2010

Grandmother birthday card

The first week of december is usualy the time to finish some christmascards, but if you have a family the size of mine, there's always some birthday to celebrate in between all of the angel & christmastree-stamps...

Today, I'm making a birthdaycard for my grandmother-in-law.
She's a big fan of the simple, classic style and adores everything that involves flowers.

So, specially for her, I made this card:


Stamped the background on a piece of off-white cardstock with a diamond backgroundstamp and some pumice stone distress ink. On top are some victorian-velvet-coloured swirls.
Then a little stamping on some white cardstock. You can't see it in the picture, but the greeting is embossed with holographic embossing powder (LOVE the stuff, only downside is that it kinda sticks to everything!) - so it has a nice shine to it :)

And of course, I needed to add a flower to the card!

I distressed the edges of the flower with some ink and added it to the card with a button and a bit of sewing yarn. To finish it of, some diamond stickles in the center and it's ready to go!

Let's hope she likes it!